
The Zoom R8 manual introduces users to the recorder’s features and functions‚ providing a comprehensive guide to maximize recording‚ sampling‚ and audio interface capabilities effectively․
1․1 Overview of the Zoom R8 Recorder
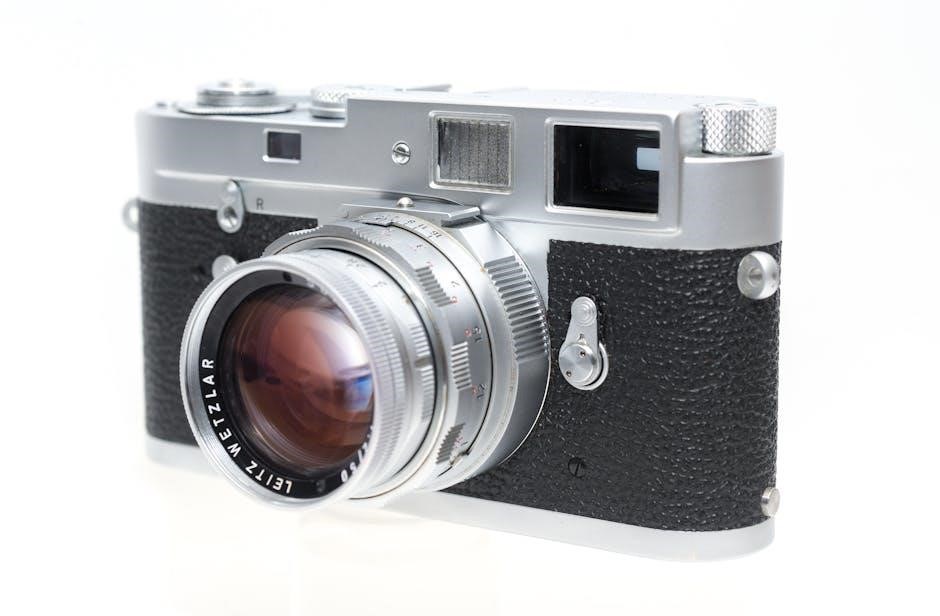
The Zoom R8 is a versatile 8-track digital recorder‚ sampler‚ and audio interface designed for musicians and producers․ It combines a compact‚ portable design with robust features‚ enabling high-quality recording‚ editing‚ and mixing․ The device supports up to 24-bit/96kHz resolution and features a built-in drum machine‚ effects‚ and a user-friendly interface․ It’s ideal for both studio and field recordings‚ offering flexibility and power in a single unit․
1․2 Importance of the Manual for Effective Usage
The manual is essential for unlocking the full potential of the Zoom R8․ It guides users through setup‚ operation‚ and advanced features‚ ensuring optimal performance․ Covering key functions‚ troubleshooting‚ and safety tips‚ the manual helps users avoid errors and achieve professional-grade recordings․ By following the manual‚ musicians and producers can maximize the device’s capabilities‚ streamline their workflow‚ and create high-quality audio with ease and confidence․
Key Features of the Zoom R8
The Zoom R8 features an 8-track recorder‚ built-in sampler‚ and audio interface‚ making it a versatile tool for music production and creative projects․
2․1 8-Track Recording Capability
The Zoom R8 offers 8-track simultaneous recording‚ allowing users to capture multiple audio sources independently․ With 16-bit/44․1kHz resolution‚ it ensures high-quality sound․ Each track features volume control‚ pan‚ and effects‚ enabling precise mixing․ This capability makes it ideal for recording live performances‚ podcasts‚ and music projects‚ providing flexibility and professional-grade results in a portable design․
2․2 Built-in Sampler and Drum Machine
The Zoom R8 features a built-in sampler and drum machine‚ enhancing creativity․ Users can trigger samples and drum patterns directly‚ with 16 pads for intuitive control․ The sampler supports up to 24-bit/44․1kHz resolution‚ ensuring high-quality sounds․ The drum machine offers various preset kits‚ allowing for versatile rhythm creation․ This functionality makes the R8 a versatile tool for music production and live performance‚ combining recording and sampling seamlessly․
2․3 Audio Interface Functionality
The Zoom R8 doubles as a USB audio interface‚ connecting directly to your computer for high-quality recording․ It supports up to 6 inputs and 8 outputs‚ with low-latency monitoring and phantom power for condenser mics․ Compatible with major DAWs‚ the R8 simplifies recording and production workflows․ Its audio interface mode allows seamless integration with software like Cubase LE‚ making it a versatile tool for both studio and live applications․
Setting Up the Zoom R8
Setting up the Zoom R8 involves connecting the device‚ installing drivers‚ and configuring settings for optimal performance in recording‚ sampling‚ and audio interface modes․
3․1 Connecting the Device to Your Computer
Connect the Zoom R8 to your computer using a USB cable․ For Windows‚ install the Zoom R8 audio driver from the official website․ Macintosh systems do not require a driver; Once connected‚ the R8 will appear as an audio interface in your DAW or recording software․ Ensure the device is properly recognized before launching your recording or playback sessions․
3․2 Installing the Zoom R8 Audio Driver
Download the Zoom R8 audio driver from the official Zoom website․ For Windows‚ follow the installation guide provided in the driver package․ Macintosh systems do not require a driver․ After installation‚ restart your computer to ensure proper functionality․ The driver enables the R8 to function as an audio interface‚ allowing seamless integration with your DAW or recording software․
3․3 Configuring the Audio Interface
Connect the Zoom R8 to your computer via USB․ Open your computer’s audio settings and select the R8 as the audio device․ On Windows‚ use the Control Panel‚ while on Mac‚ use Audio MIDI Setup․ Adjust the buffer size in your DAW for optimal performance․ Ensure the R8 is recognized as the audio interface to enable recording and playback functionality․ Proper configuration ensures low latency and high-quality audio processing․
Recording Modes on the Zoom R8
The Zoom R8 offers versatile recording modes‚ including mono and stereo options‚ catering to different audio capture needs․ This section explores the device’s flexible recording capabilities․
4․1 Mono Recording Setup
Mono recording on the Zoom R8 allows users to capture single-source audio with clarity․ Assign mono tracks to specific inputs‚ ideal for isolating instruments or vocals․ Connect microphones or instruments directly to the R8‚ and configure settings for optimal sound quality․ This mode is perfect for precise control over individual audio sources‚ enabling detailed editing and mixing in post-production․ Ensure proper gain staging for clean‚ professional-grade recordings․
4․2 Stereo Recording Configuration
Stereo recording on the Zoom R8 captures a wide soundstage by utilizing two channels․ Assign inputs to left and right tracks‚ ideal for recording acoustic instruments or ambient sounds; Use the built-in effects like delay and chorus to enhance the stereo image․ Configure the DAW to assign a stereo track for seamless integration․ This mode offers a balanced and immersive audio experience‚ perfect for capturing complex soundscapes or live performances with depth and clarity․
Effects and Processing
The Zoom R8 offers a variety of built-in effects to enhance your recordings‚ including delay‚ chorus‚ and ensemble․ These effects can be applied during or after recording‚ allowing for creative sound shaping and customization to achieve the desired audio quality․
5․1 Built-in Effects Overview
The Zoom R8 features a suite of built-in effects to enhance your recordings․ These include delay‚ chorus‚ and ensemble effects‚ which can be applied during or after recording․ The ensemble effect adds depth and resonance‚ while delay and chorus provide dynamic sound shaping․ These tools allow for creative customization‚ enabling users to achieve professional-quality audio with ease and precision‚ making the R8 versatile for various musical applications․
5․2 Using the Ensemble Effect
The ensemble effect on the Zoom R8 creates a rich‚ resonant sound by simulating a chorus of instruments․ This effect is ideal for enhancing vocals or instruments‚ adding depth and width to your recordings․ Adjust parameters like level and tone to tailor the effect to your sound․ Perfect for creating lush‚ layered textures‚ the ensemble effect is a powerful tool for achieving professional-grade audio productions with ease and creativity․
5․3 Applying Delay and Chorus Effects
The Zoom R8 offers versatile delay and chorus effects‚ enhancing your recordings with texture and dimension․ Use delay for rhythmic depth‚ while chorus adds a wide‚ expansive sound․ Adjust parameters like delay time‚ feedback‚ and chorus rate to customize the effects․ These tools are perfect for creating dynamic‚ engaging audio‚ from subtle enhancements to bold‚ creative soundscapes‚ all accessible through the R8’s intuitive interface․
Firmware and Software Updates
Regular firmware and software updates enhance the Zoom R8’s performance‚ adding new features and fixing issues․ Download updates from Zoom’s official website and follow on-screen instructions carefully․
6․1 Updating the Zoom R8 Firmware
Updating the Zoom R8 firmware ensures optimal performance and access to new features․ Visit the official Zoom website‚ download the latest firmware version‚ and follow the installation guide․ Connect the R8 to your computer via USB‚ launch the update tool‚ and complete the process as instructed․ Always backup data before updating to avoid loss․
6․2 Installing the Latest Drivers
Installing the latest drivers for the Zoom R8 is essential for smooth operation with your computer․ Download the driver from Zoom’s official website‚ ensuring compatibility with your operating system․ Run the installer‚ follow the prompts‚ and restart your system․ For Mac users‚ no additional drivers are needed as the R8 is class-compliant․ Regular updates ensure compatibility and optimal performance․
Using the Zoom R8 with DAWs
The Zoom R8 seamlessly integrates with digital audio workstations‚ enhancing music production workflows․ Connect the device‚ configure settings‚ and unlock advanced recording and editing capabilities for professional results․
7․1 Integrating the R8 with Cubase LE
Integrating the Zoom R8 with Cubase LE enhances your music production workflow․ Install the Zoom audio driver‚ configure the R8 as an audio interface‚ and sync tracks seamlessly․ Access multi-track recording‚ editing tools‚ and effects․ Refer to the Cubase LE Startup Guide for detailed setup instructions․ This integration simplifies capturing high-quality audio and streamlines your creative process for professional results;
7․2 Syncing the R8 with Your Digital Audio Workspace
Syncing the Zoom R8 with your digital audio workspace ensures seamless integration with your DAW; Install the Zoom audio driver‚ configure the R8 as an audio interface‚ and assign inputs within your DAW․ Make sure the R8 is recognized as the audio interface and adjust settings like sample rate and buffer size for optimal performance․ Proper syncing enables precise control over recording‚ playback‚ and effects processing‚ enhancing your overall music production experience․ Always refer to your DAW’s audio settings for compatibility and configuration guidance․ This ensures a smooth workflow and high-quality audio capture․ Check the R8 manual for additional troubleshooting tips if needed․

Safety Precautions
Handle the Zoom R8 with care to avoid damage and ensure safe operation․ Always consult the manual for guidelines on proper usage and maintenance․
8․1 Handling the Device Safely
Handle the Zoom R8 with care to prevent damage․ Avoid exposing the device to extreme temperatures‚ moisture‚ or physical stress․ Use the device in well-ventilated areas and keep it away from children and pets․ Never use damaged cables or accessories‚ as this could cause malfunctions or safety risks․ Clean the device with a soft‚ dry cloth and avoid harsh chemicals․ Always power down before moving or storing the device to prevent internal component stress․ Follow the manual’s guidelines for safe and reliable operation․
8․2 Avoiding Common Operating Mistakes
Avoid using outdated firmware or incorrect audio drivers‚ as this can lead to compatibility issues․ Ensure proper connections to prevent signal loss or distortion․ Regularly clean the device and avoid exposure to moisture or extreme temperatures․ Follow the manual’s guidelines for updating firmware and installing drivers․ Always power down the device before disconnecting or moving it․ Read the manual thoroughly before operation to prevent errors;
Troubleshooting Common Issues
Resolve audio interface problems by updating firmware and reinstalling drivers․ Check connections and settings․ Ensure proper power supply and avoid overheating․ Refer to the manual for solutions․
9․1 Resolving Audio Interface Problems
Audio interface issues often arise from outdated firmware or incorrect settings․ Start by updating the Zoom R8 firmware to the latest version․ Ensure the audio driver is installed correctly on your computer․ Restart the device and reconnect it to your system․ Verify that all cables are securely connected․ If problems persist‚ reinstall the driver or reset the R8 to its factory settings․ Always refer to the official manual for detailed troubleshooting steps․
9․2 Fixing Firmware Update Errors
Firmware update errors often occur due to interrupted processes or outdated software․ Ensure a stable power connection and avoid disconnecting the R8 during updates․ If an error occurs‚ restart the device and retry the update using the latest firmware from the official Zoom website․ Additionally‚ ensure all drivers are up-to-date and compatible with your operating system․ If issues persist‚ reset the R8 to its factory settings before attempting the update again․

Additional Resources
For further assistance‚ visit the official Zoom support page for guides‚ firmware updates‚ and troubleshooting․ Explore community forums and user-generated resources for additional tips and discussions․
10․1 Accessing the Official Zoom Support Page
The official Zoom support page offers extensive resources for the R8‚ including manuals‚ firmware updates‚ and troubleshooting guides․ Visit www․zoom․co․jp to access these materials․ The site provides detailed documentation‚ ensuring users can resolve issues and optimize their device’s performance․ Additionally‚ it features a knowledge base and FAQs for quick solutions to common queries․
10․2 Finding Community Forums and User Guides
Community forums and user guides provide valuable insights and tips for using the Zoom R8․ Visit platforms like Zoom’s official forum or third-party sites to connect with other users․ Search for specific topics or issues‚ and explore detailed user-generated guides․ These resources often include tips‚ tricks‚ and solutions shared by experienced R8 users‚ helping you maximize your device’s potential and troubleshoot common challenges effectively․